


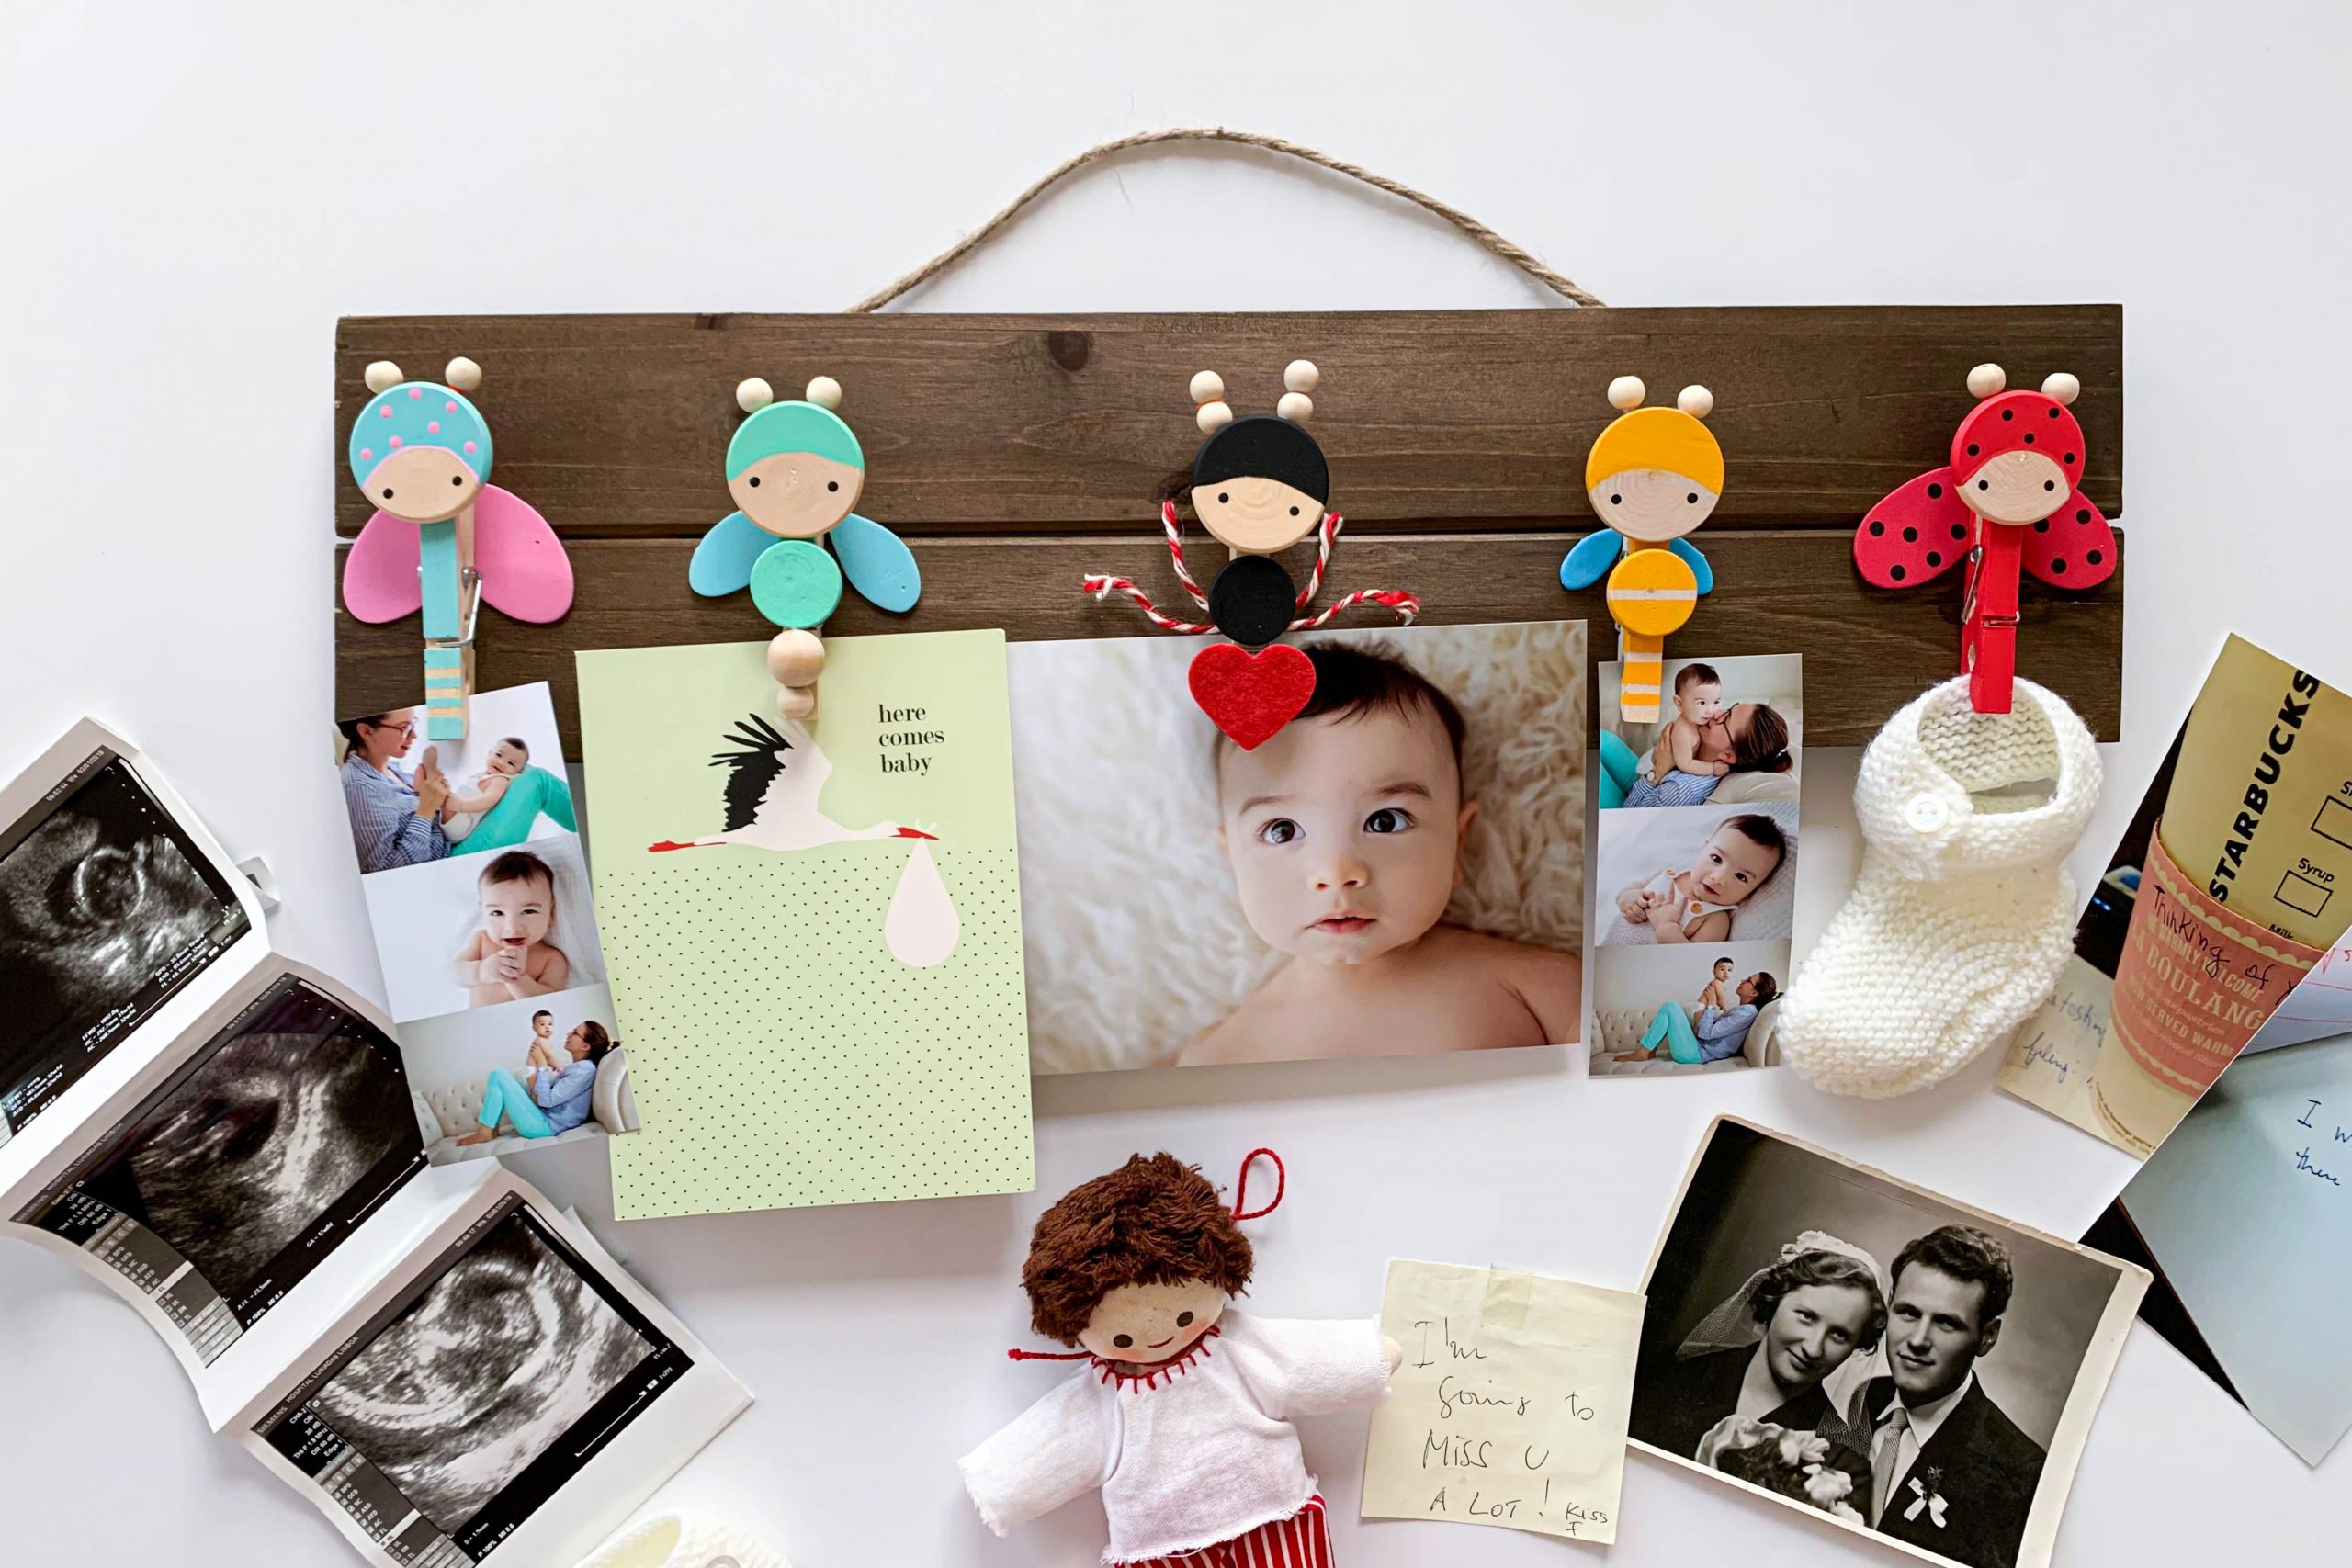
Do you have favorite photos or little treasures cluttered on your desk or in a drawer? Why not display them on your wall?! Let’s get creative and construct a memory wall filled with love bugs that will cherish special moments forever.
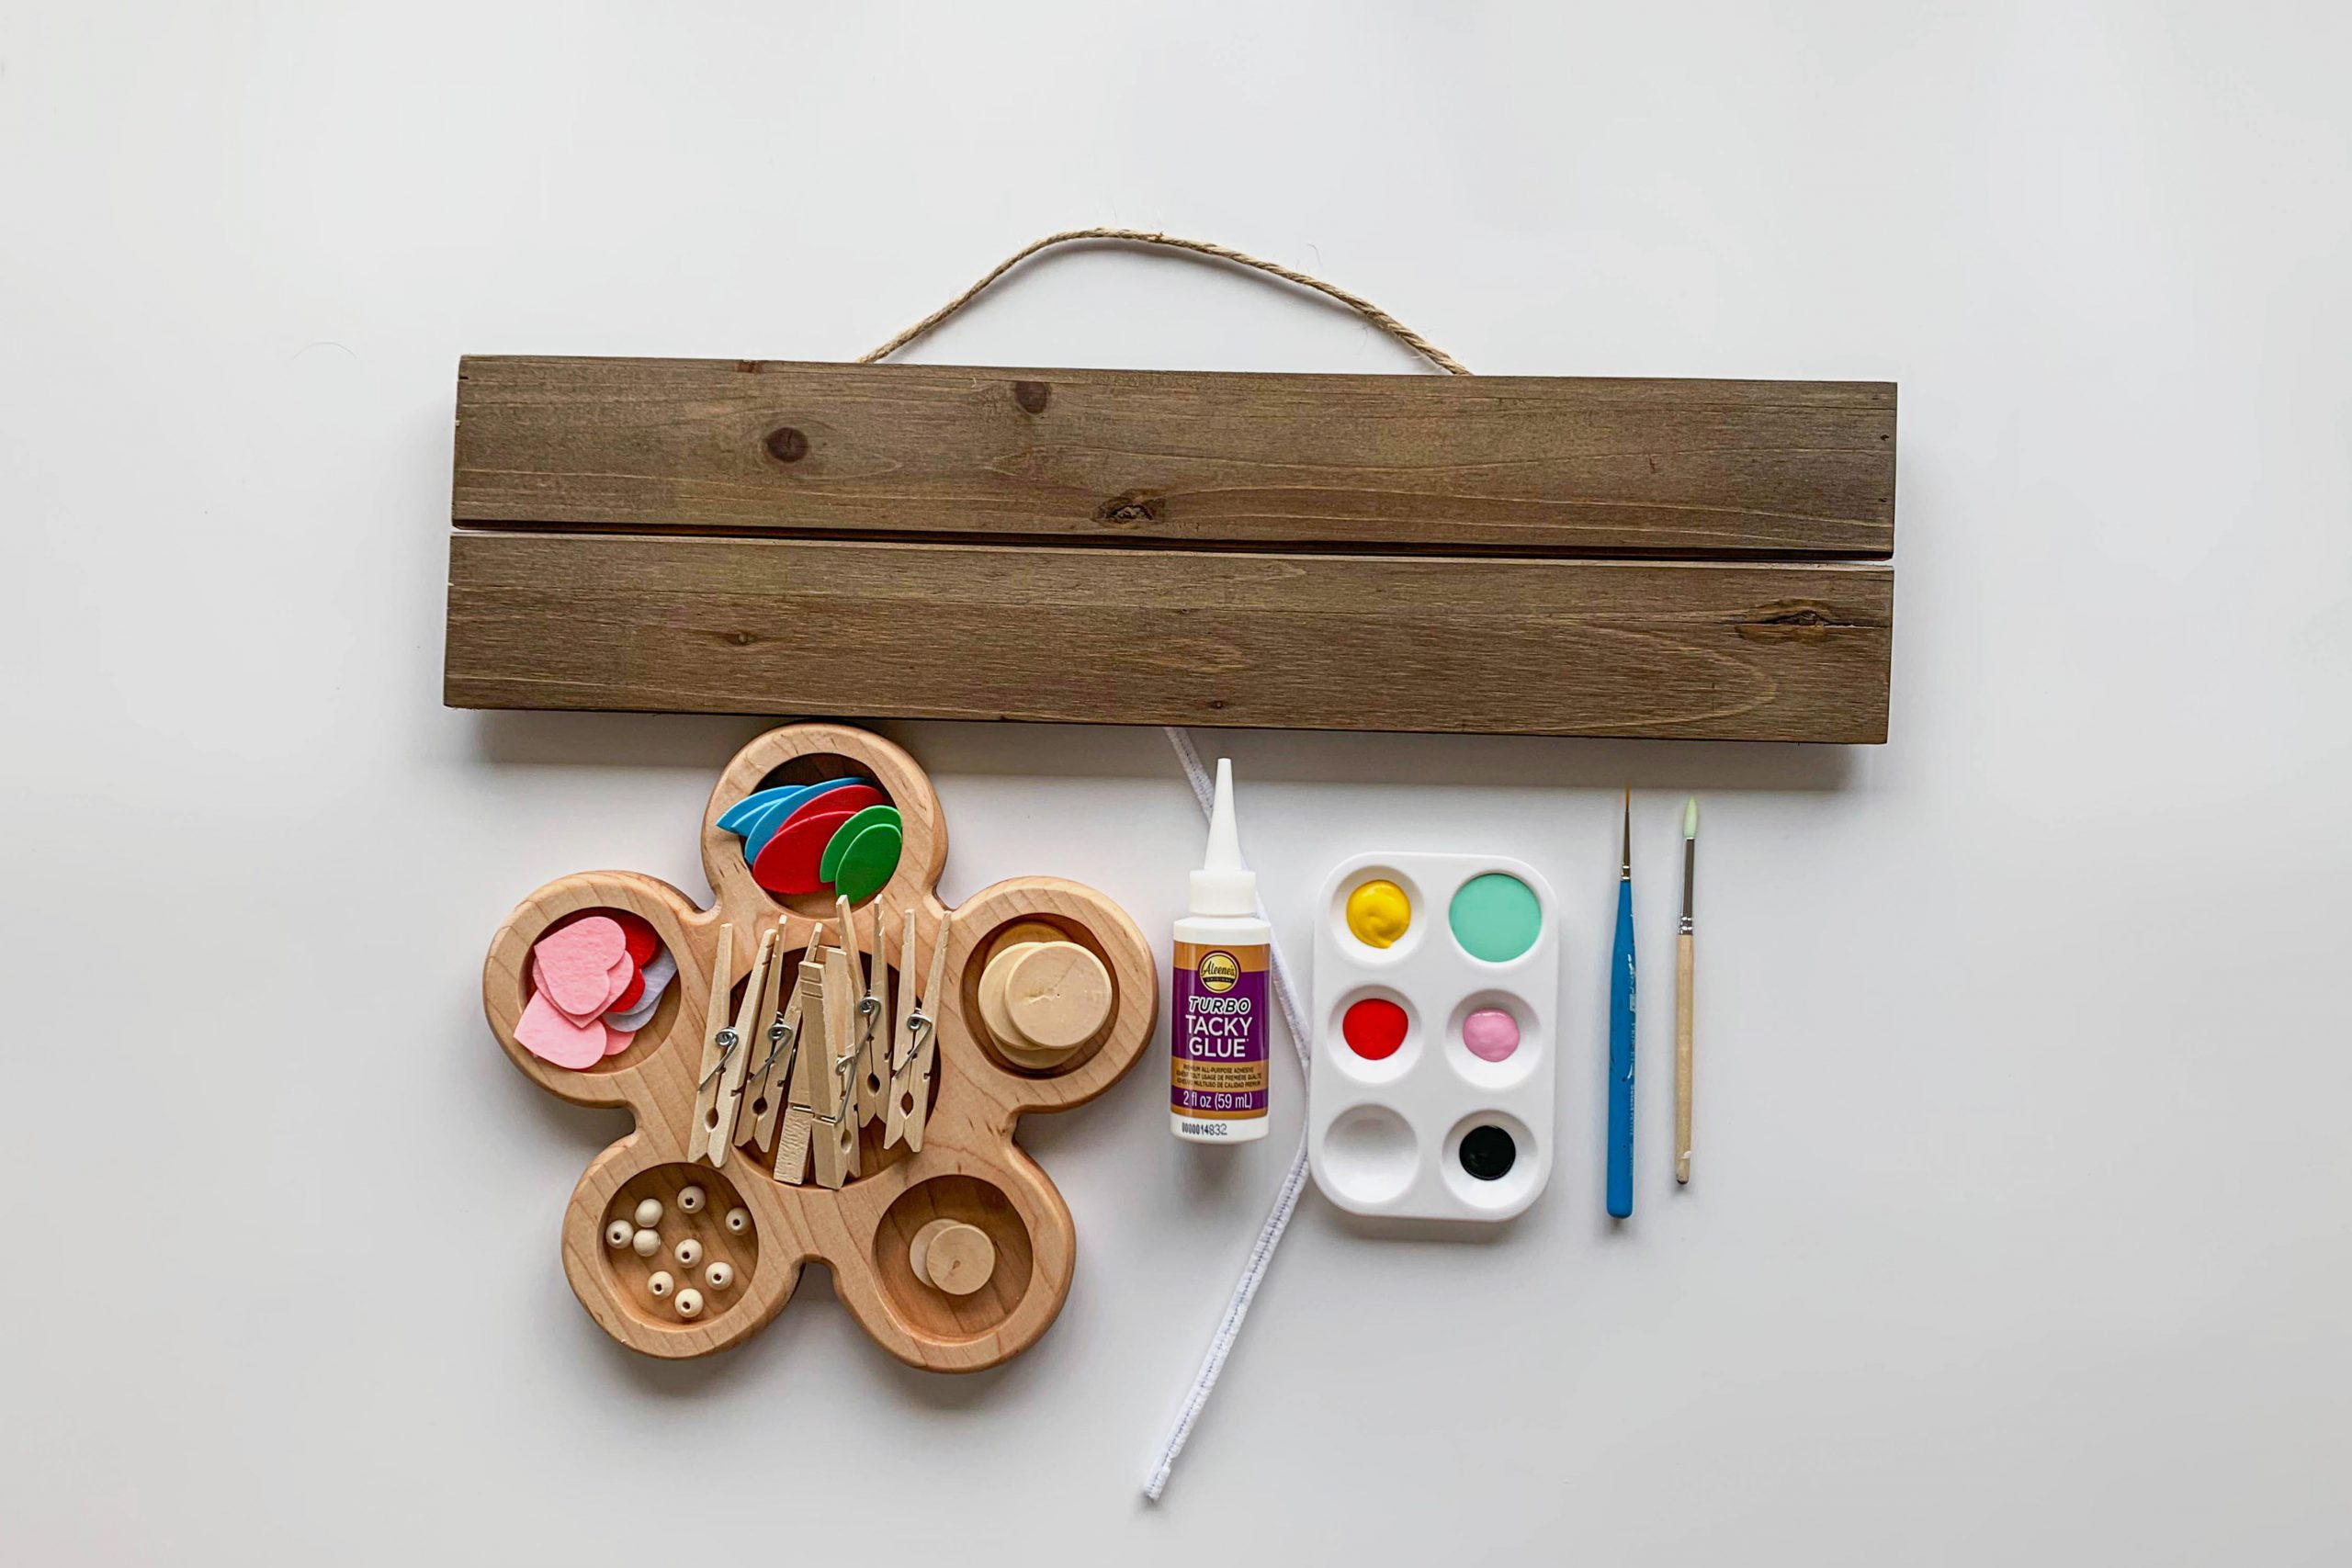
Materials:
- Wood pallet plaque or a wooden ruler
- Aleene’s Turbo Tacky Glue
- Clothespins
- Wooden discs 1.5 in & 1 in
- Wooden beads
- Felt or foam shapes
- Pipe cleaner
- Acrylic paint
- Paintbrushes
- Scissors
How to Make a Love Bug Memory Wall:
Step 1:
Design your own love bugs. There is no right or wrong way. Have fun designing them. First, color one side of each clothespin with one acrylic paint color. Let it dry, and paint an additional layer if needed. Paint the head of the bug on the large wooden disk. The smaller wooden disk can be used for the bug’s thorax.
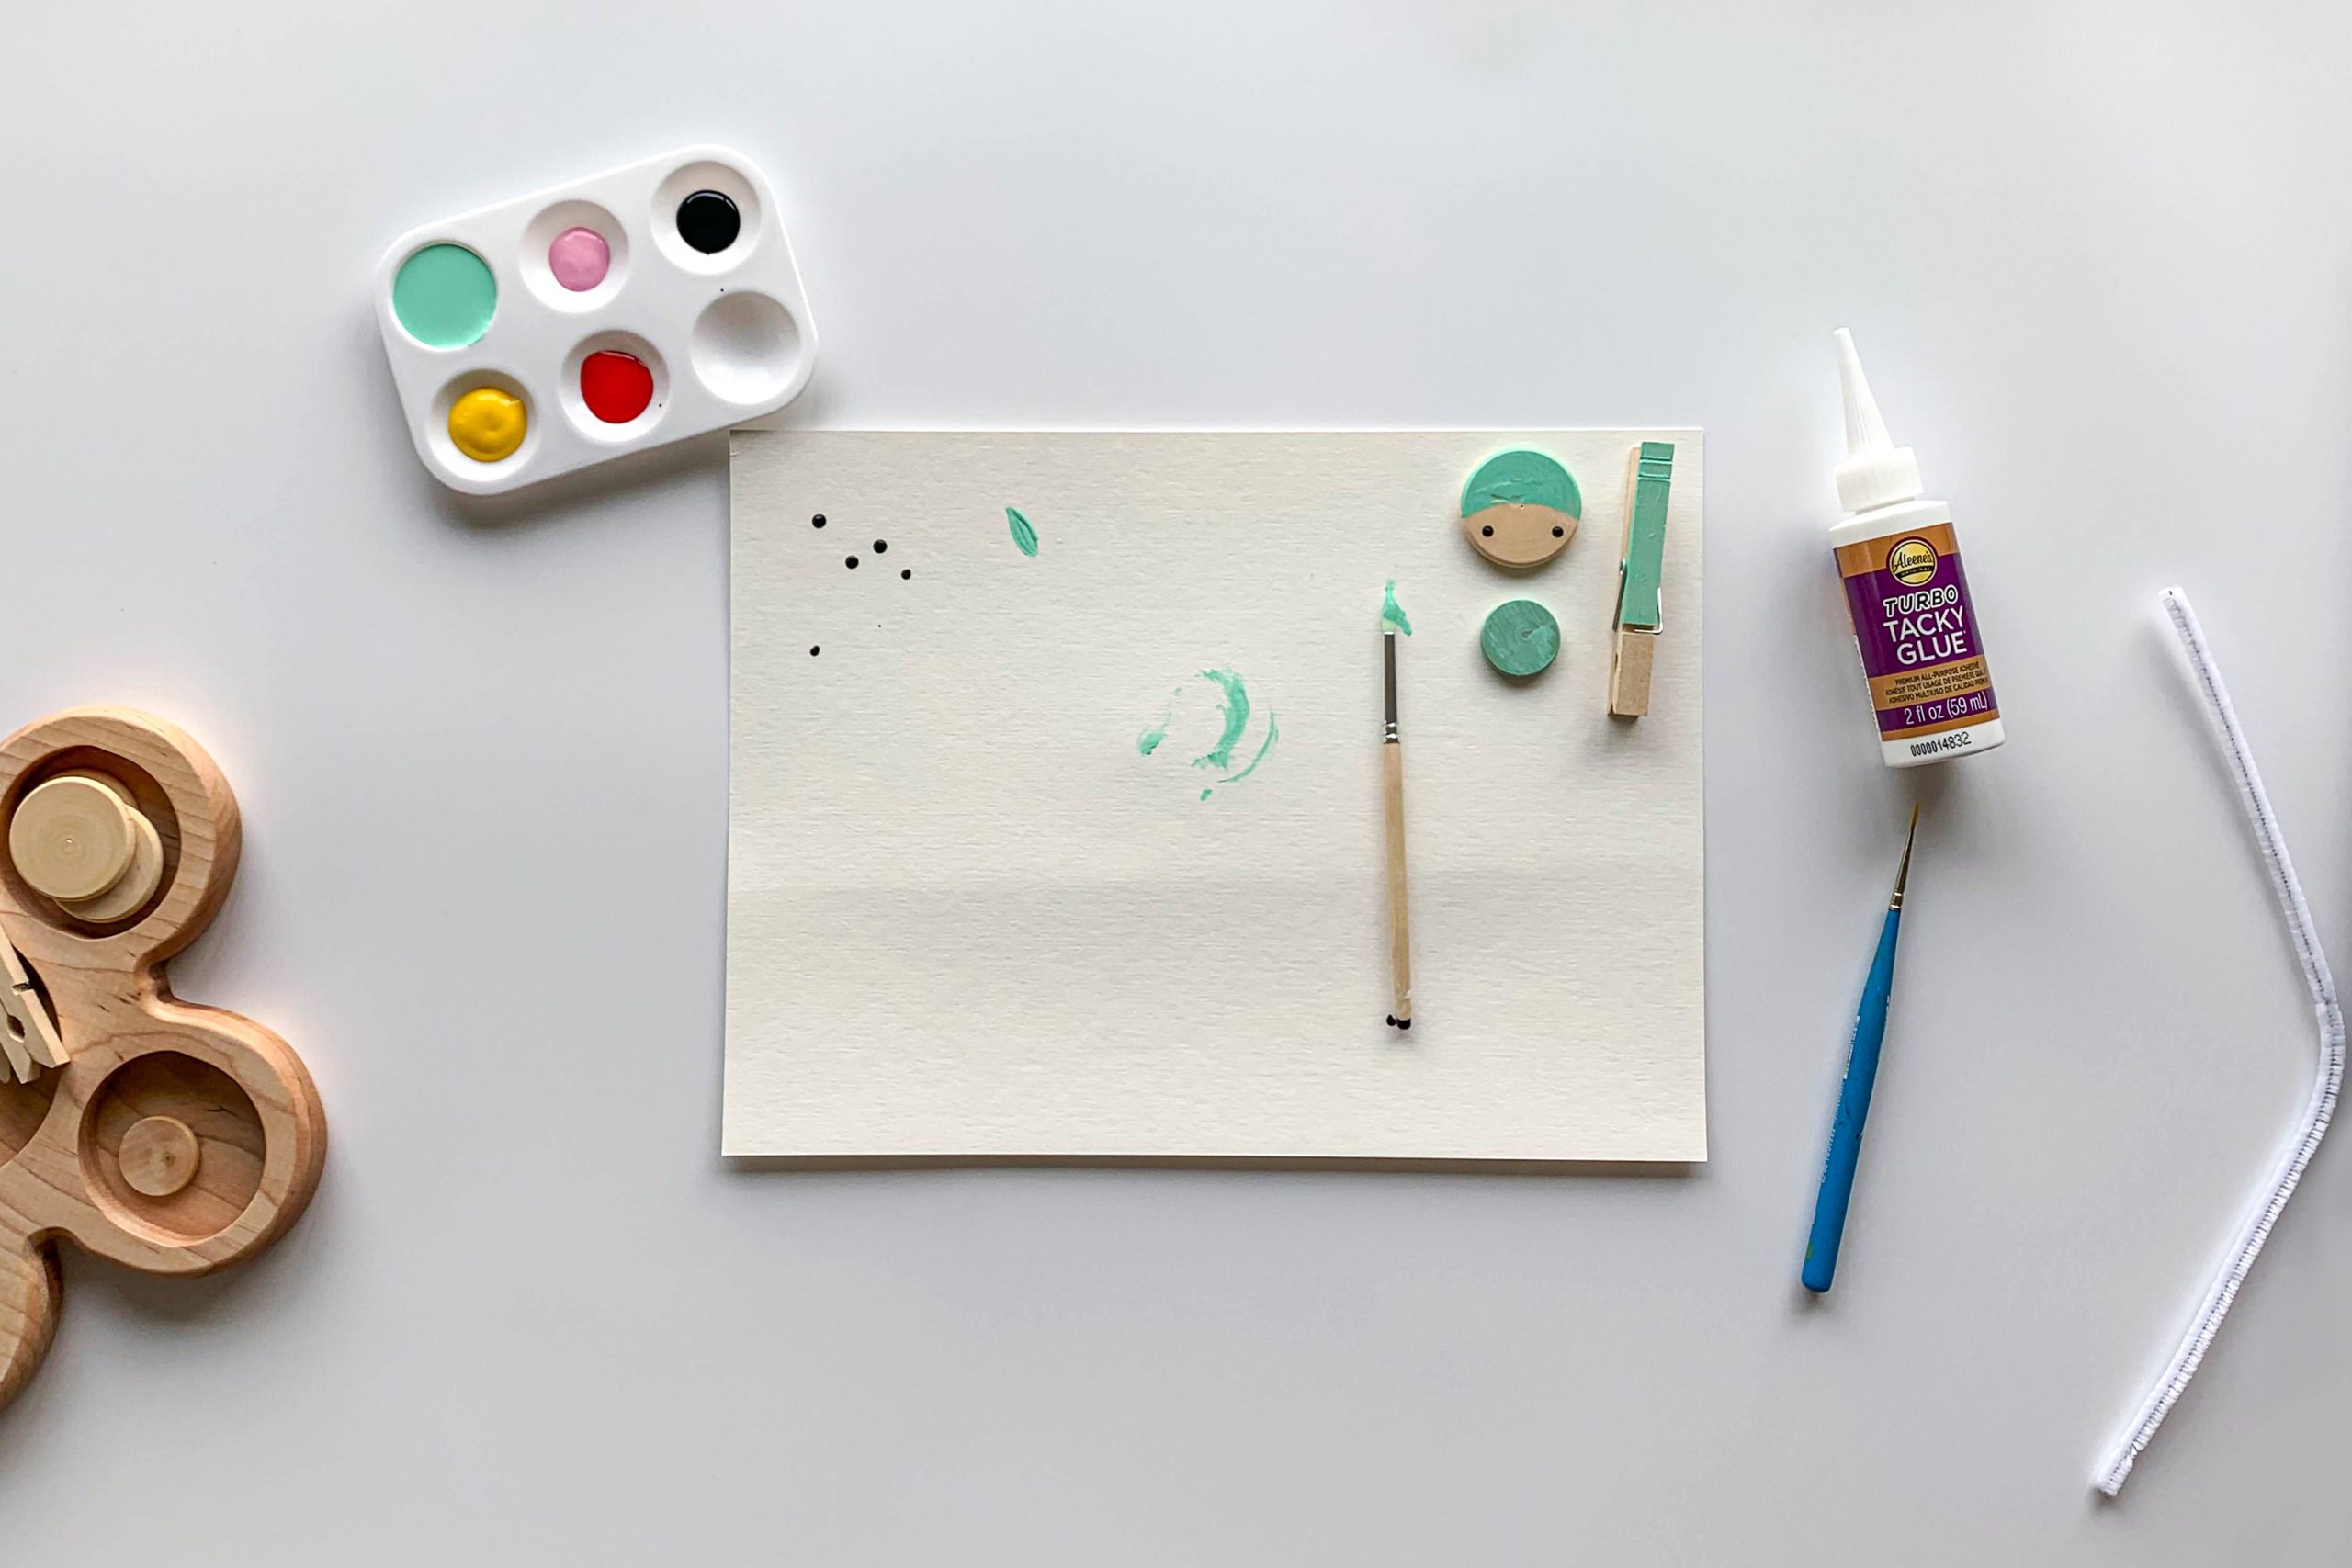
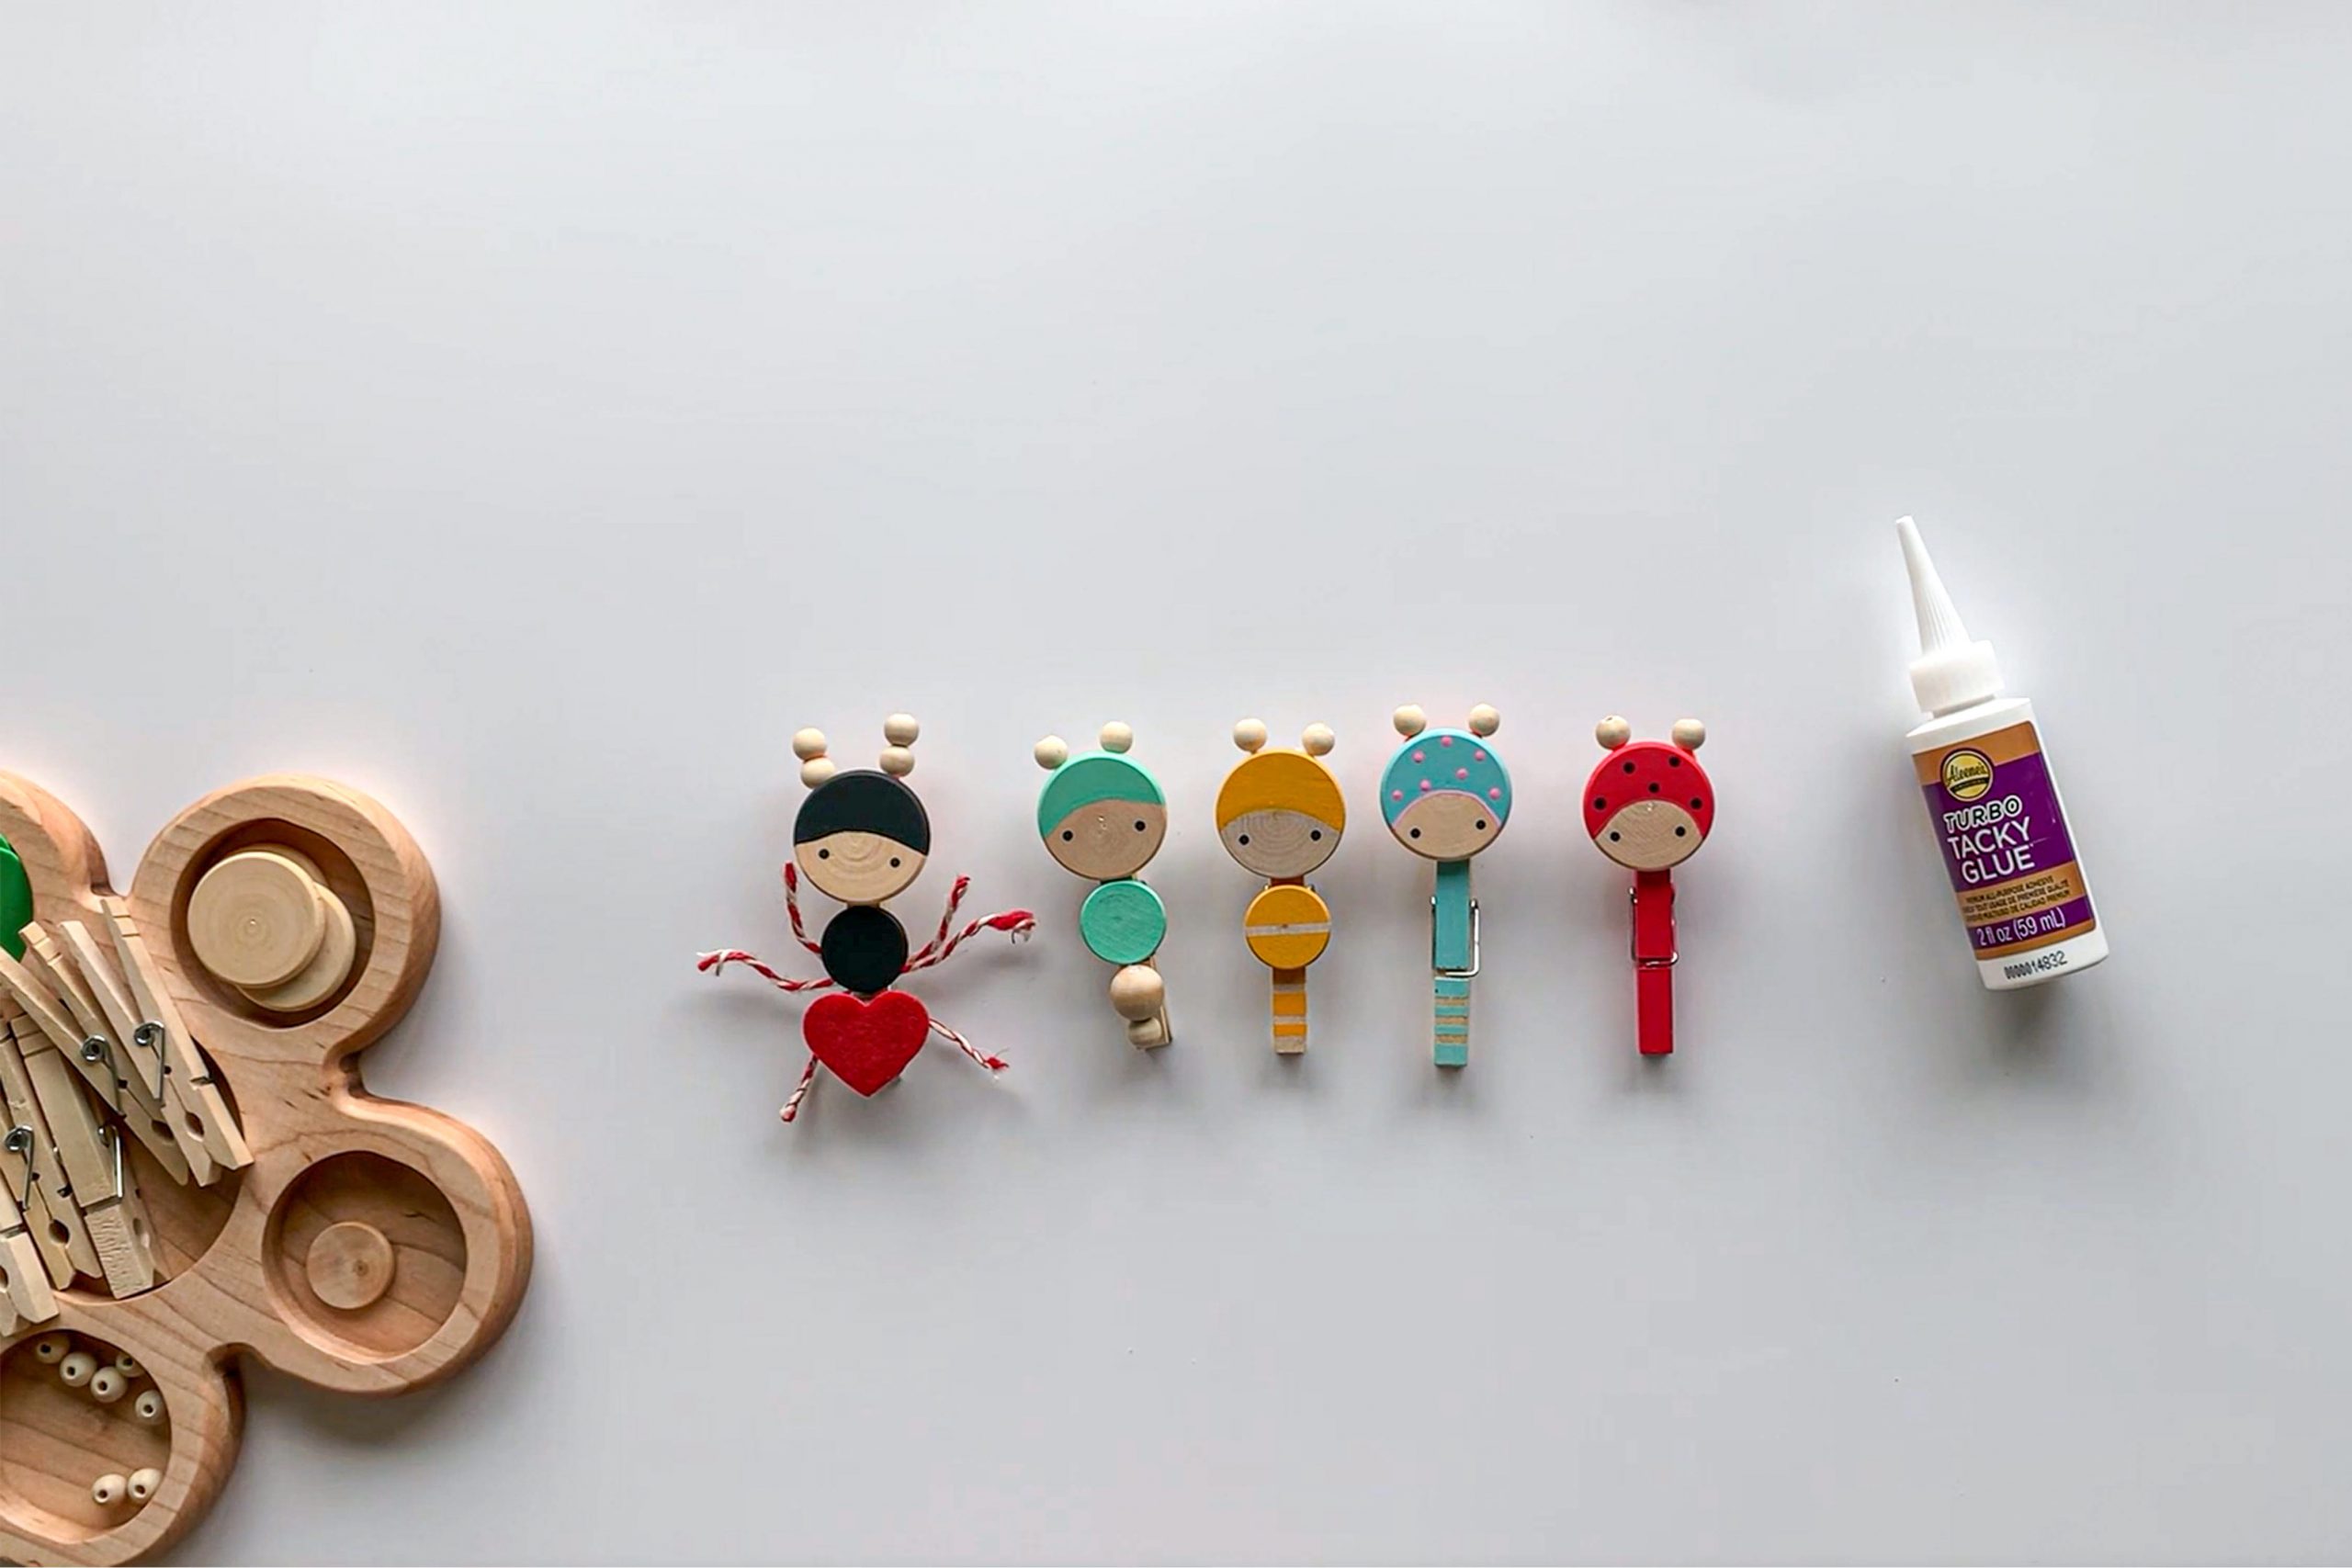
Cut 2 inches of pipe cleaner and thread the beads onto each end. Bend the pipe cleaner’s ends to make sure the beads stay in place.
Step 2:
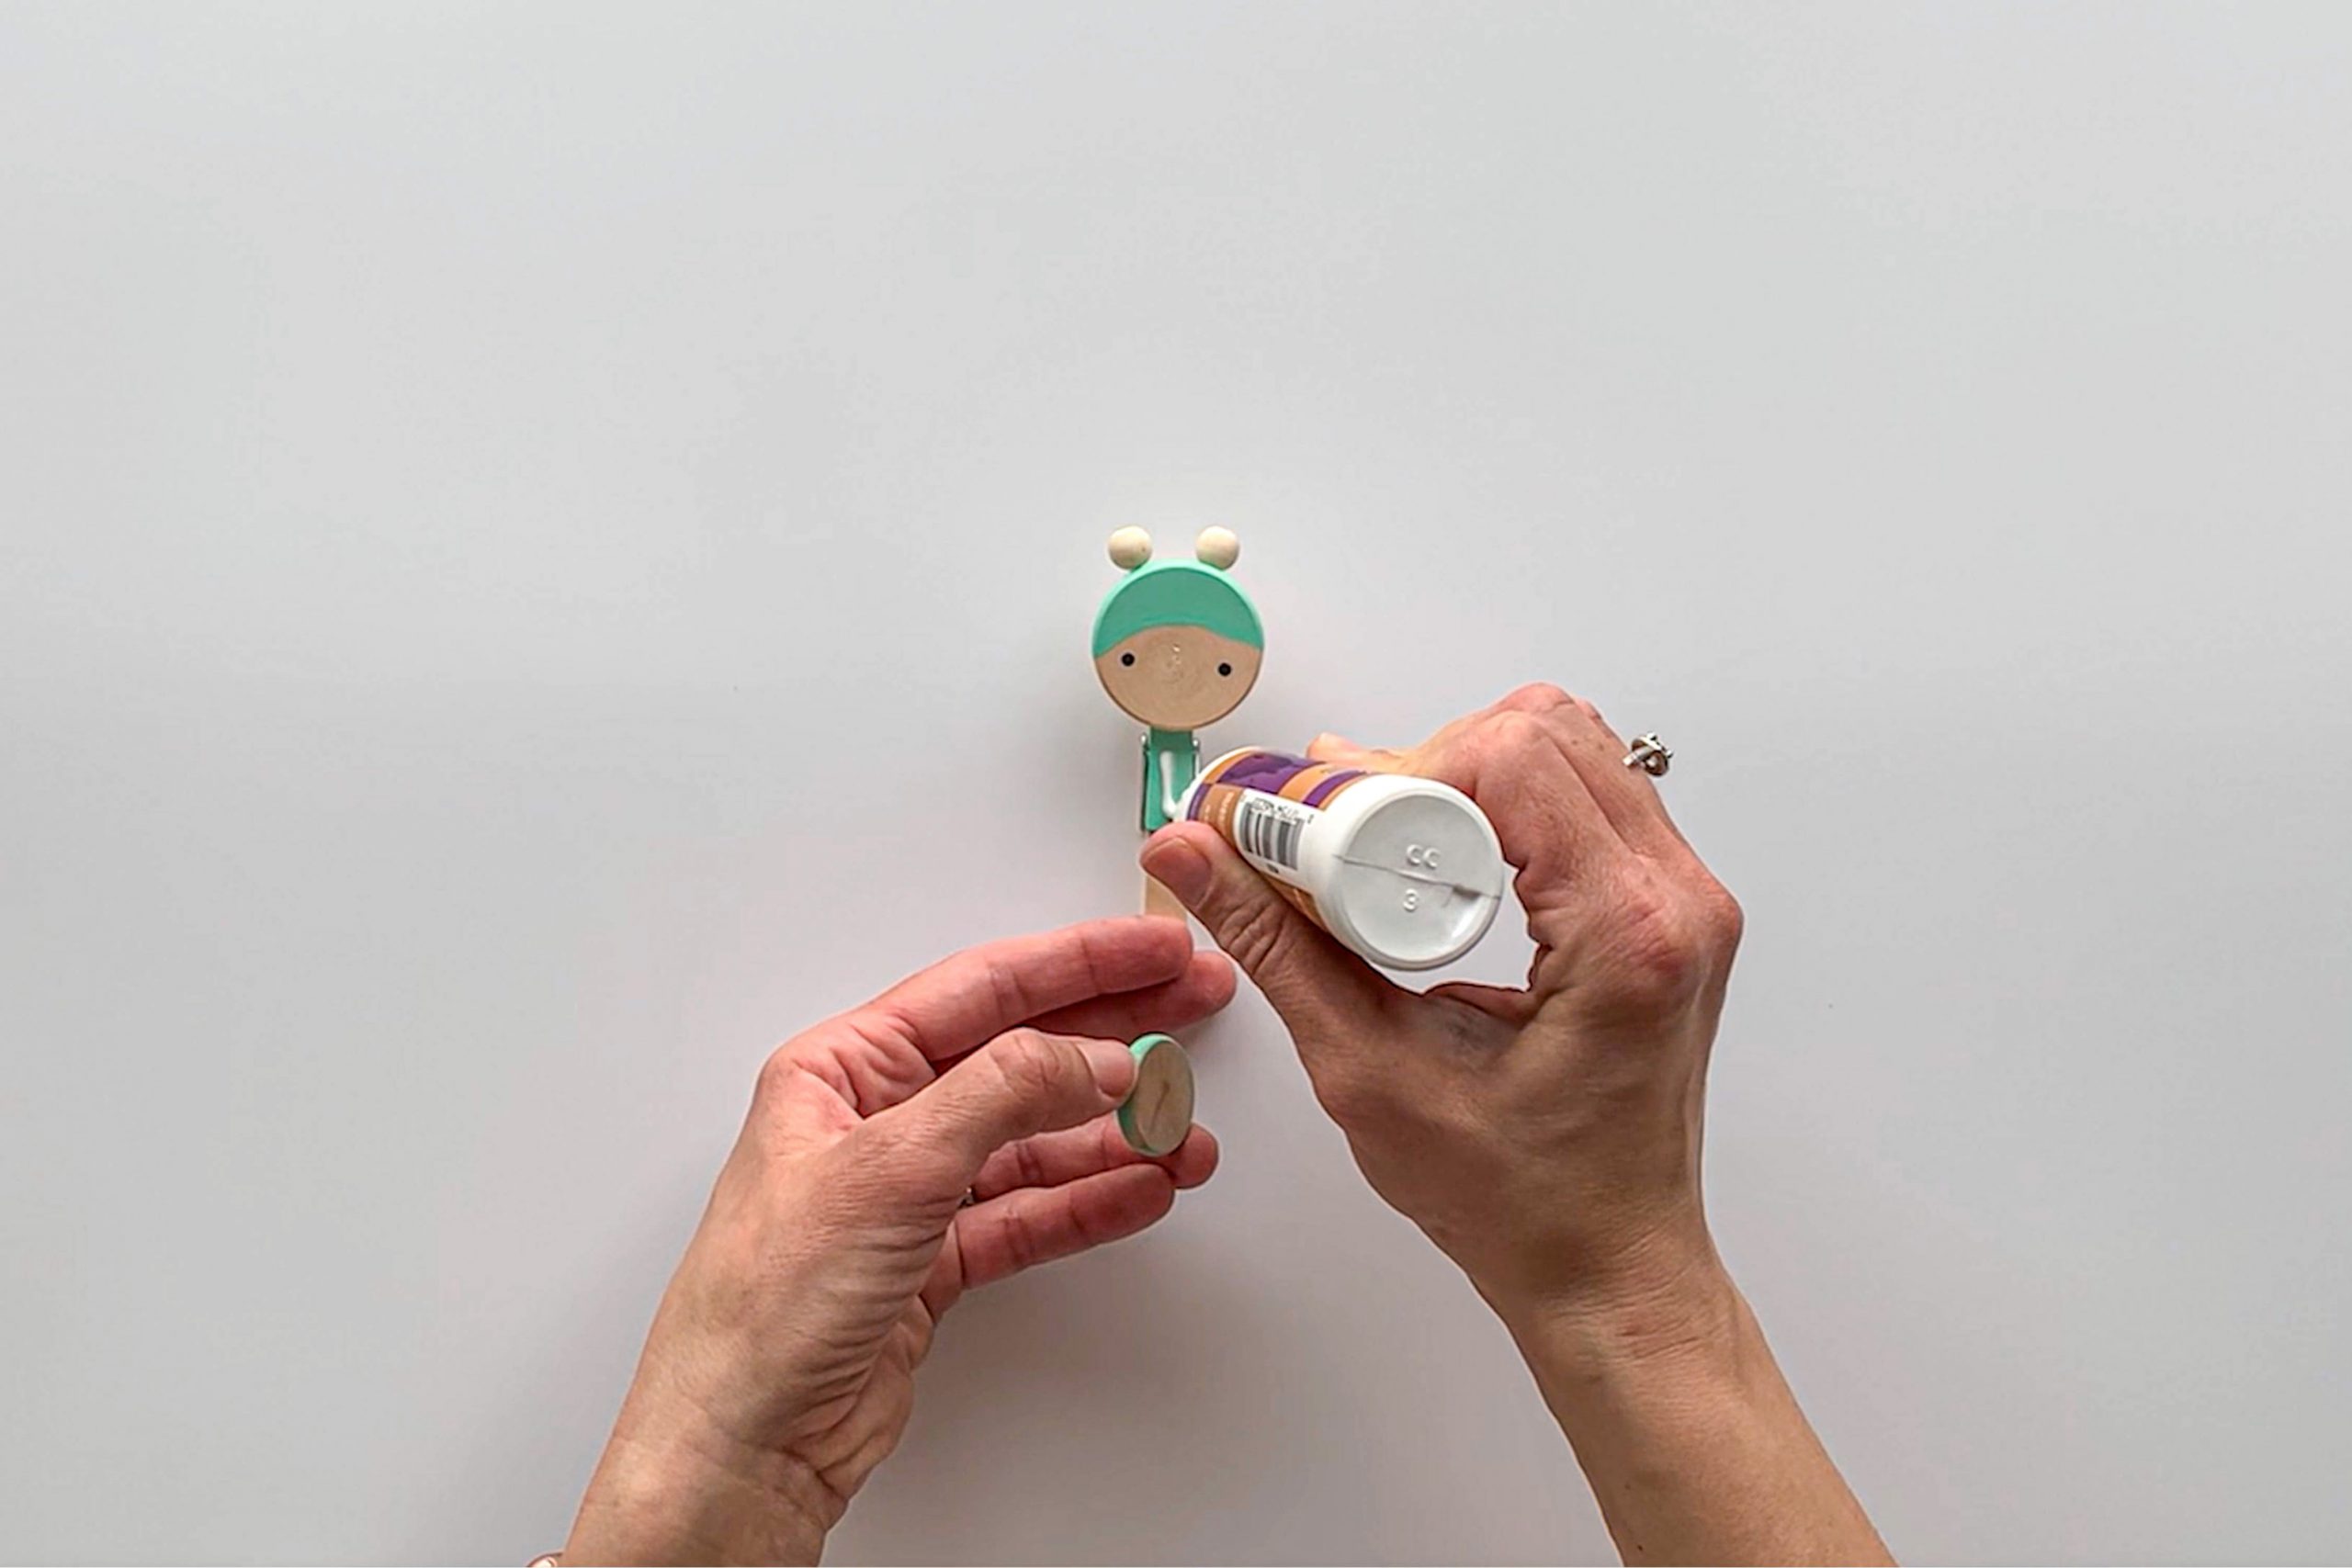
Apply the Turbo Tacky Glue on the pipe cleaner and stick it onto the back of the head. What I like about this glue is the needle nose. It makes the application very precise; you won’t miss a spot. In addition, it dries 50% faster than other glues so you can work as fast as you like.
Once you stick the pipe cleaner onto the bug’s head, glue the head to the top of the painted side of the clothespin. Next glue the thorax right below the head. You can glue anything else you like. For example, I glued two beads together and stuck them onto the clothespin. This Turbo Tacky Glue works like magic. You can glue wood on wood, felt, glass, plastic, wool or even foam. I was surprised myself how well this Turbo Tacky Glue works.
Step 3:
Design as many bugs as you like. You can even create little people or teddy bears. There are endless possibilities.
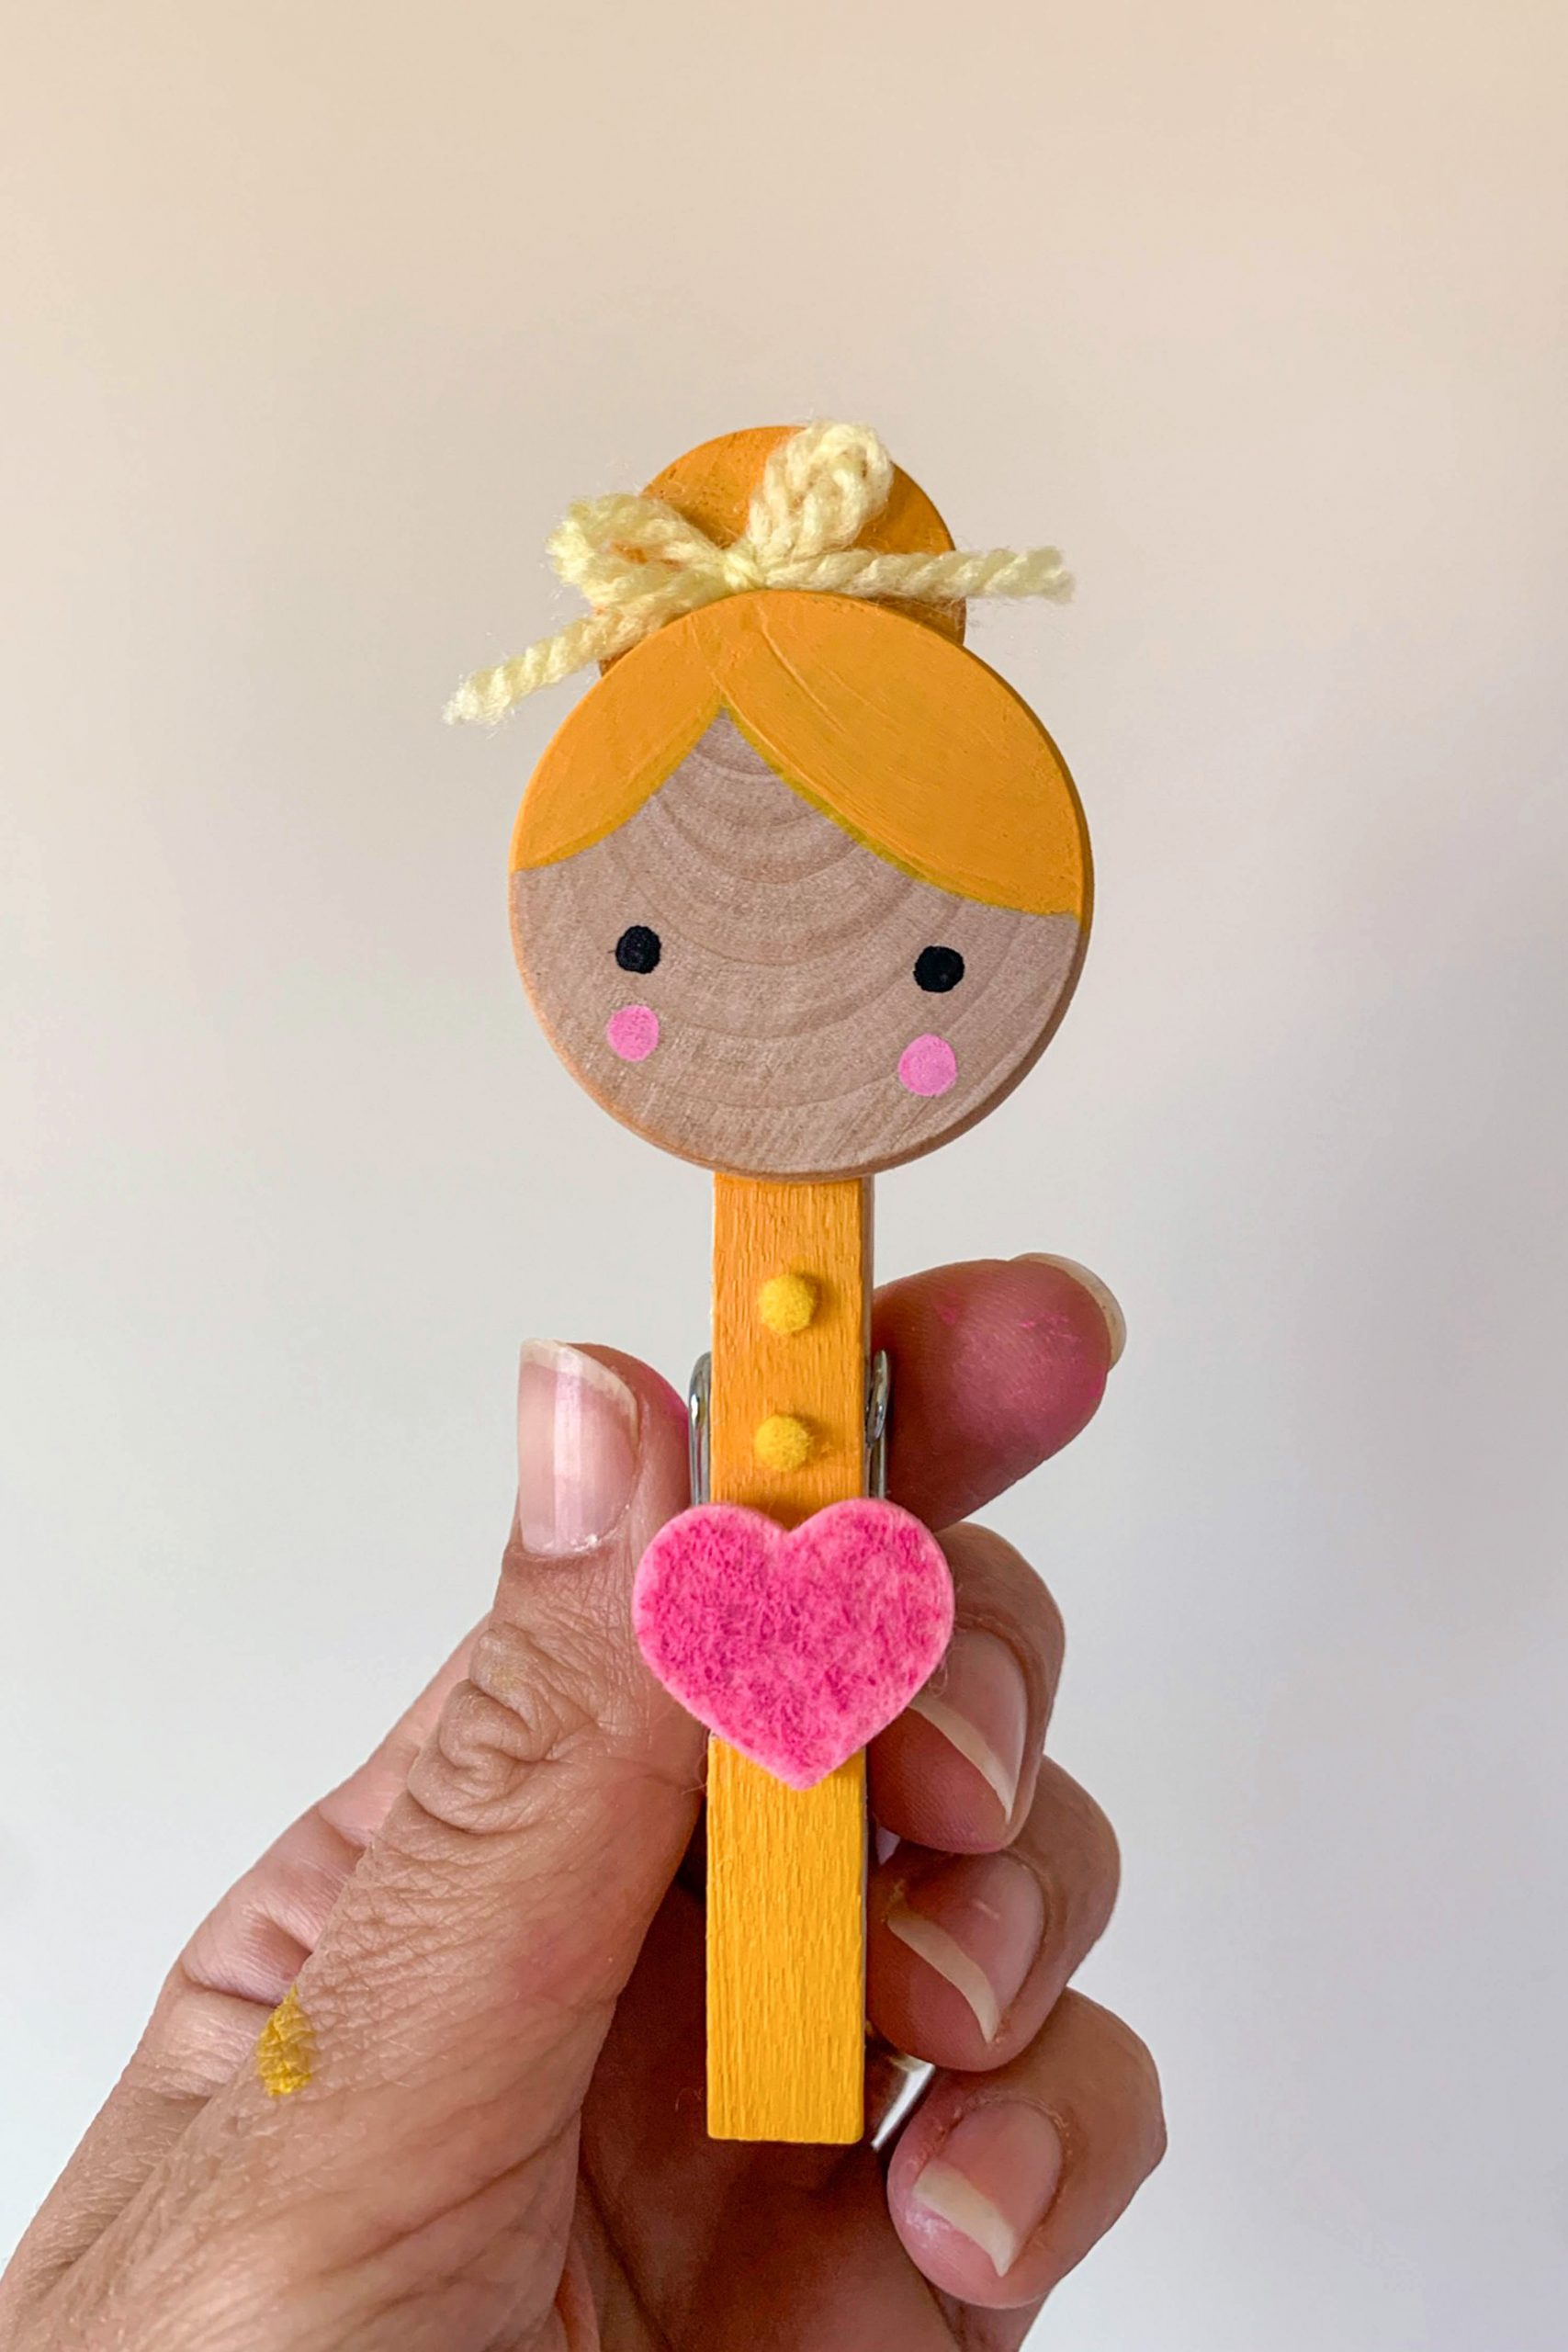
If you are creating love bugs, remember to NOT stick the wings onto the clothespins. (If you do so, you will create a gap between the clothespins the wooden pallet. It would be difficult to glue the love bugs appropriately to the wooden pallet.)
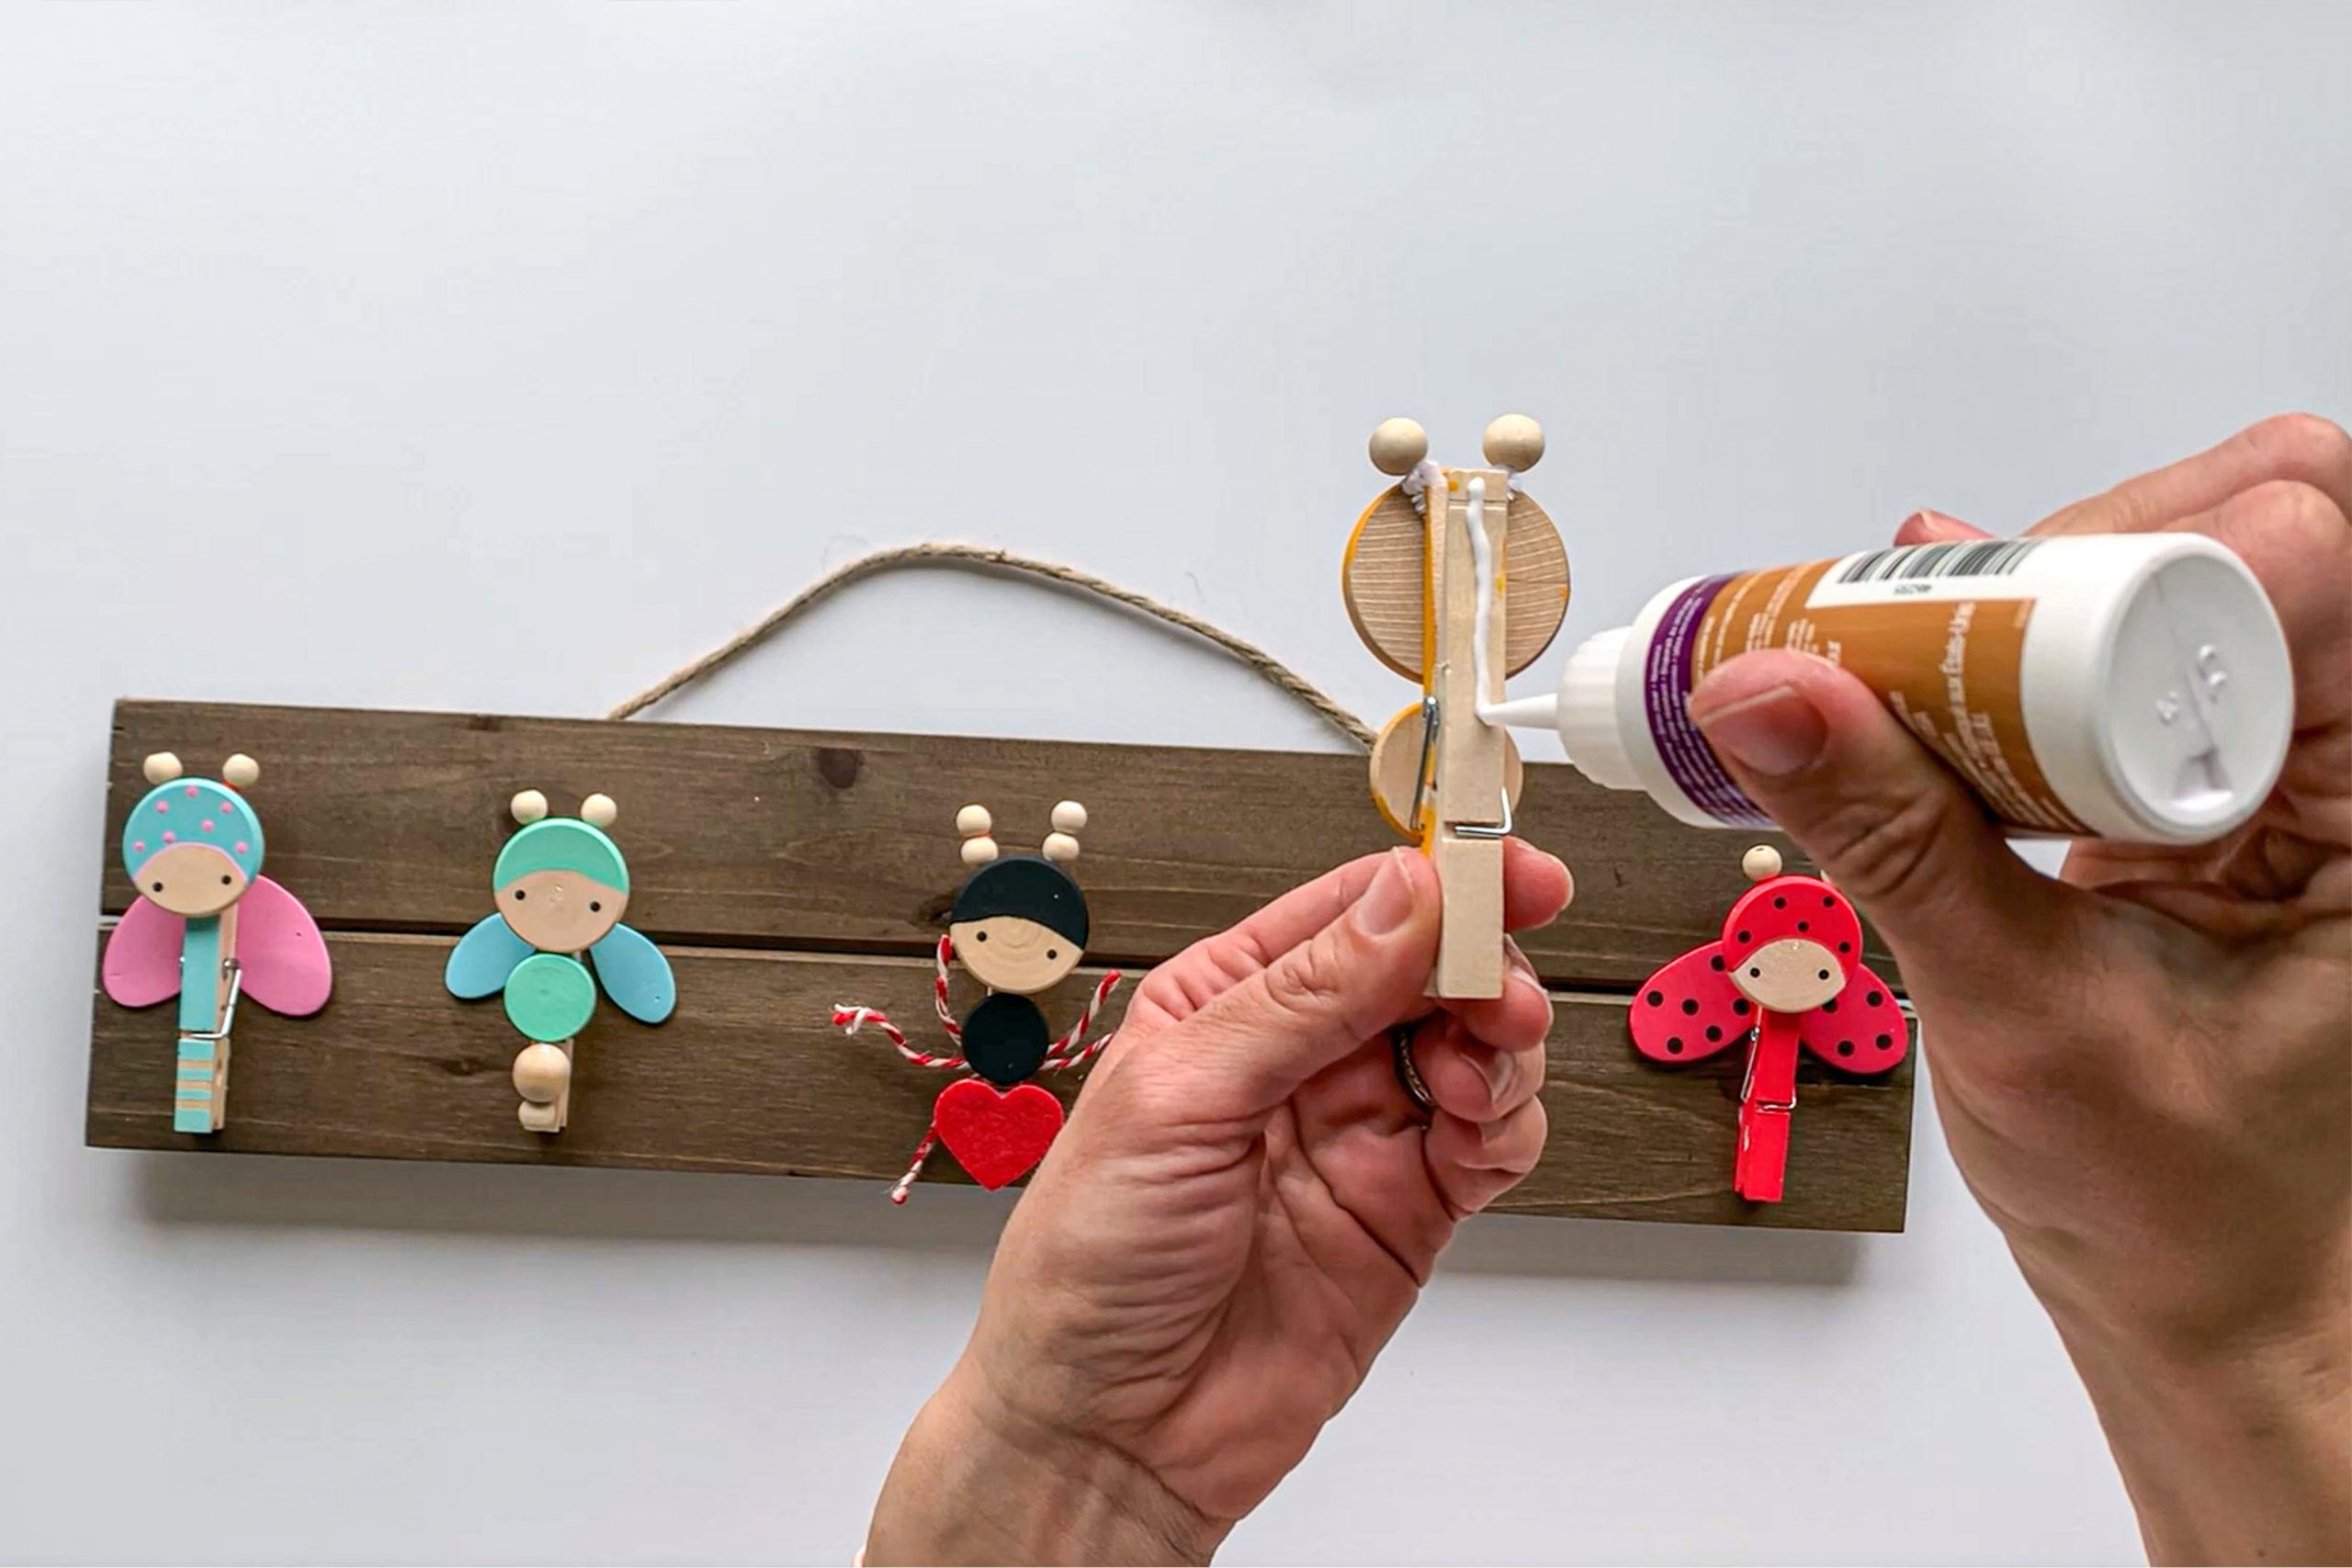
Step 4:
Measure the wooden pallet plaque and mark where the middle point is. Glue one of the bugs right in the middle. If your bug has wings, make sure you glue one pair of the wings first, then the clothespin, and then the second pair of wings. If you make a mistake, for example gluing one of the wings too high, move quickly to adjust it. The Turbo Tacky Glue dries very fast.

Step 5:
Repeat Step 4 until all the love bugs are glued onto the wooden pallet. You can glue them as close as you like, depending on what you would like to display on your memory wall.
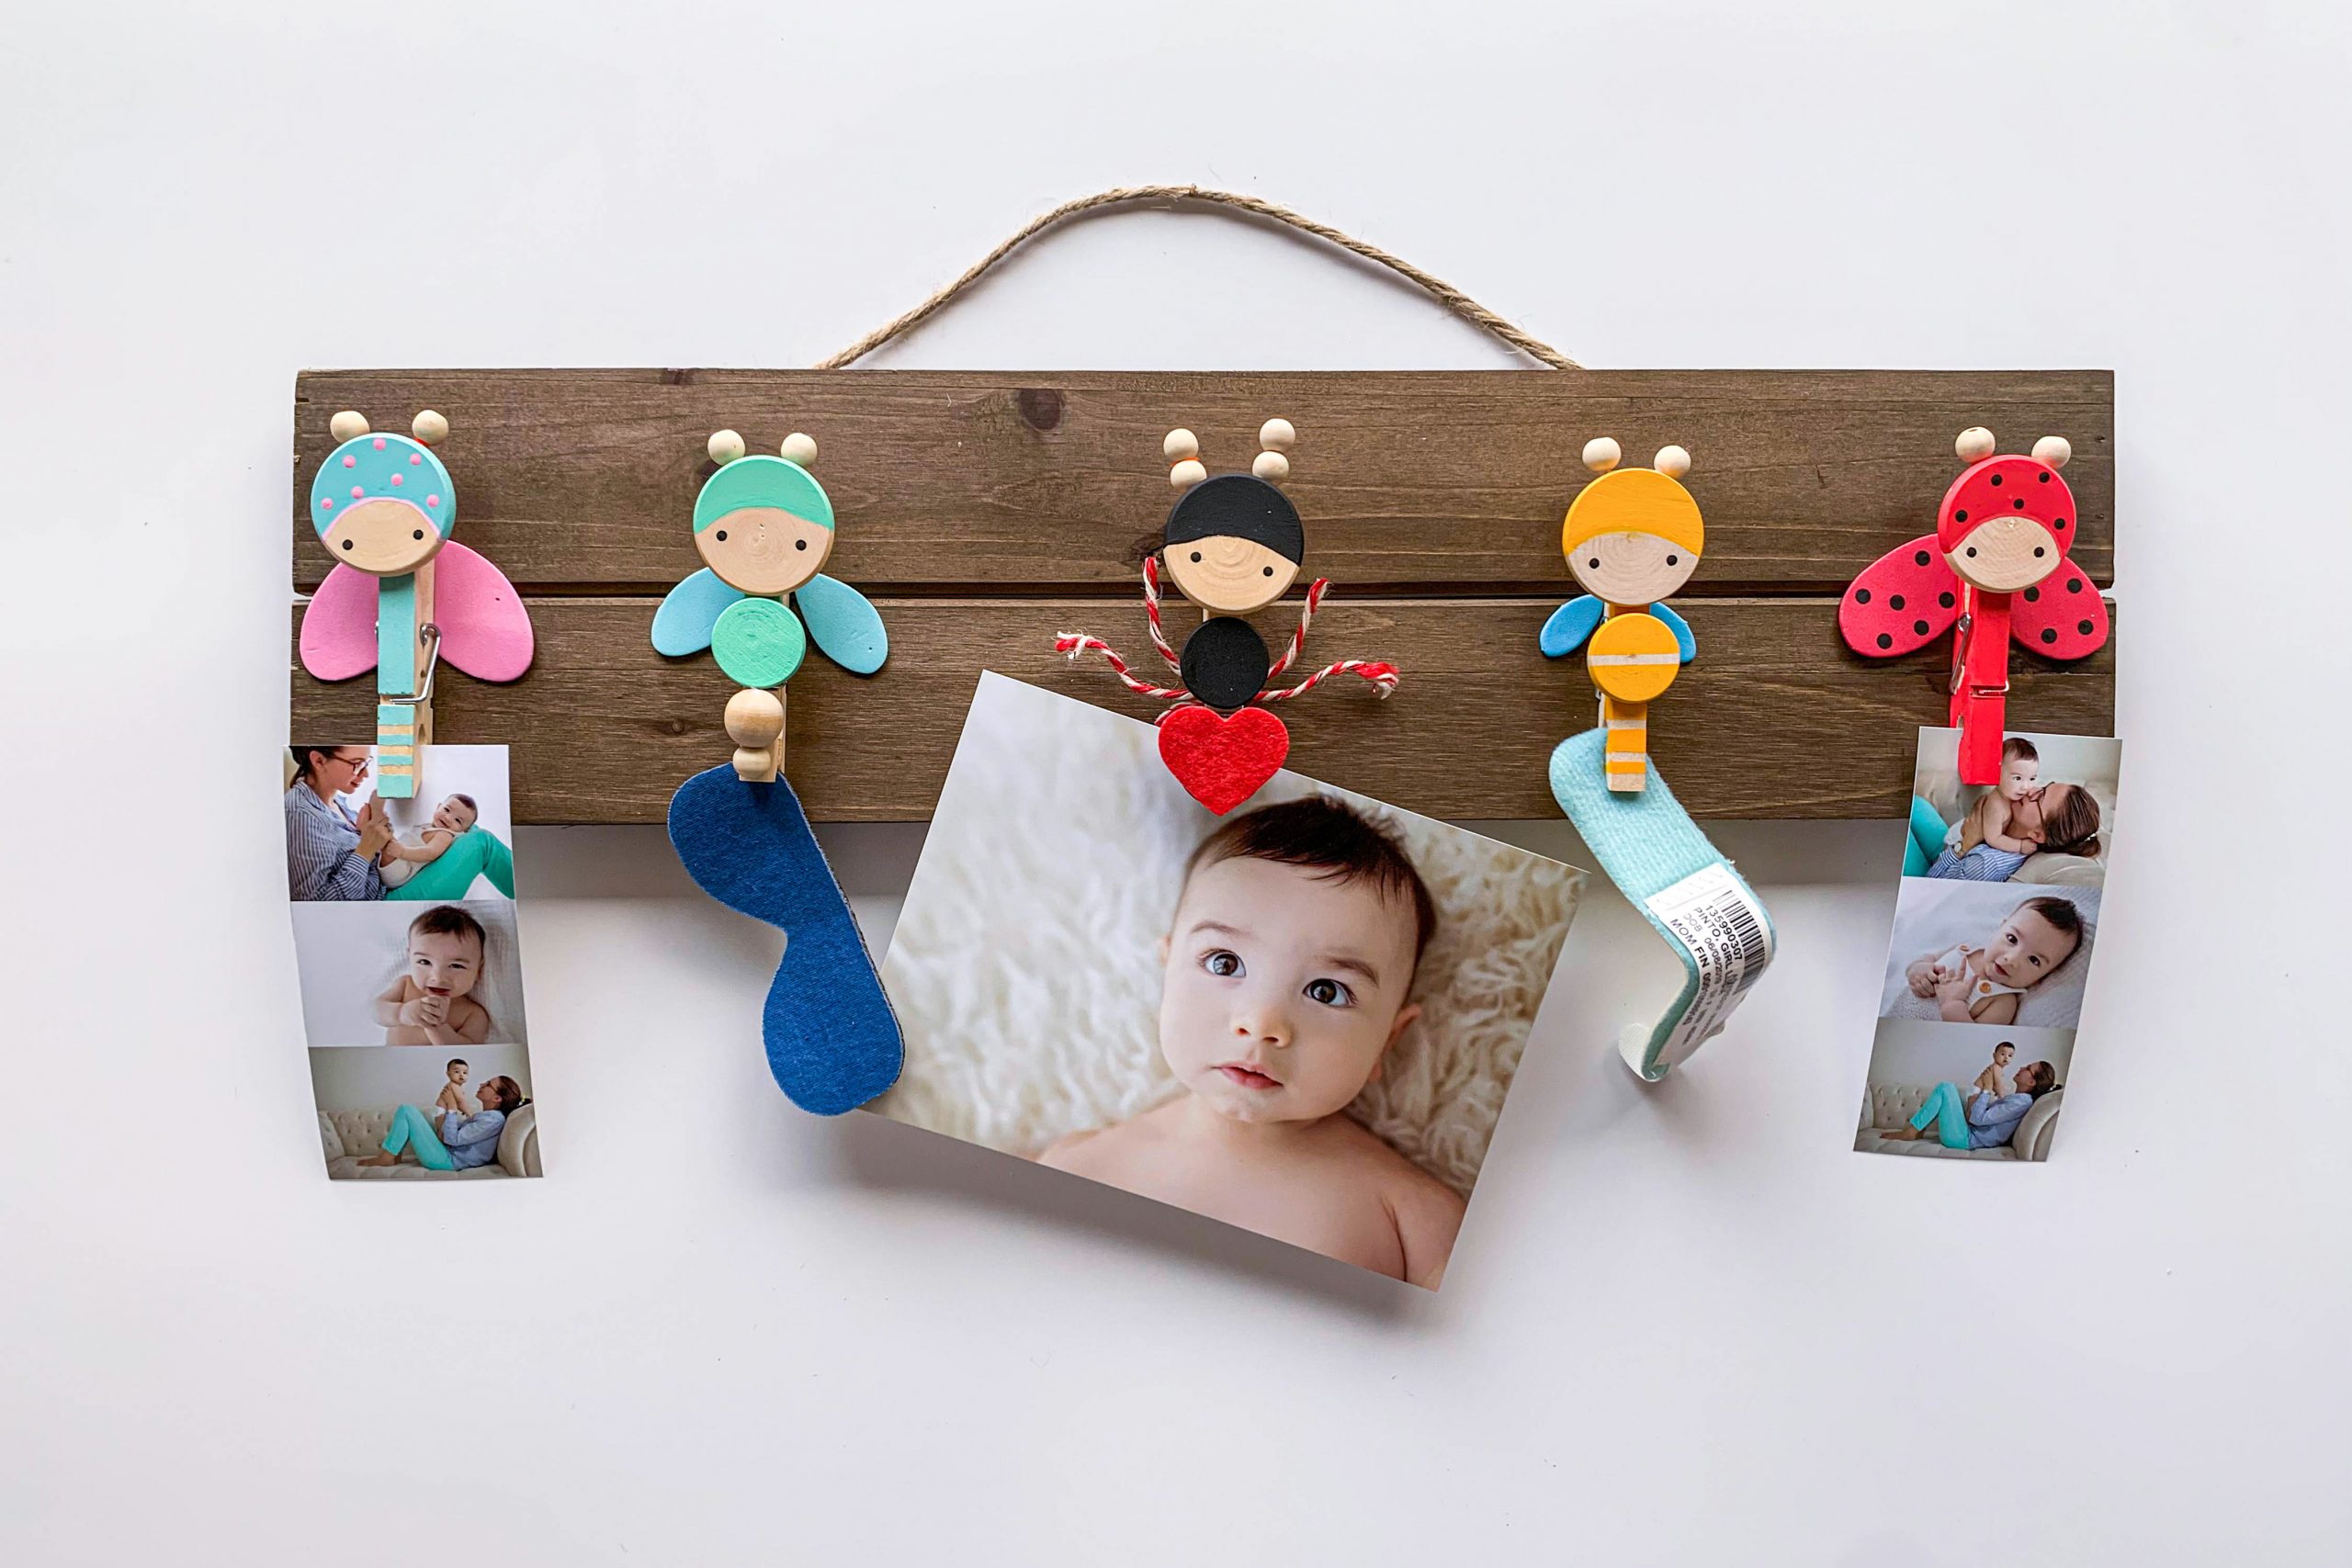
Step 6:
You won’t need to wait too long to display your treasures as the Turbo Tacky glue does the job well. Select photos, little treasures or artwork your little one has made, and the wall is ready to keep your memories alive.
If you try this DIY Love Bug Memory Wall, please share it with me by tagging @lulu__make on Instagram.
I cannot wait to see what you will create! Stay tuned for more fun and easy projects for you and your little one. Happy Crafting!
This article does contain Amazon Affiliate links. If you choose to purchase through these links, a teeny tiny portion would go to support our site and we would be so grateful!


